

How to Create a Free Web Server on AWS Using EC2 and Nginx (For Beginners)
Do you know you can make your own website server without buying a computer for it?
Amazon AWS gives you a free virtual computer (EC2) that runs on their big data centers.
Today, we’ll use that to create a web server and install Nginx (a program that shows websites).
Why Are We Doing This?
Imagine your computer at home is switched on and connected to the internet — you can share files or run a website from it. But it’s risky and costly.
Instead, AWS lets you rent a safe, powerful computer in the cloud for free (in the Free Tier).
We will:
- Create that cloud computer (EC2 instance).
- Install a web server program (Nginx).
- See our website running live.
Step-by-Step Guide
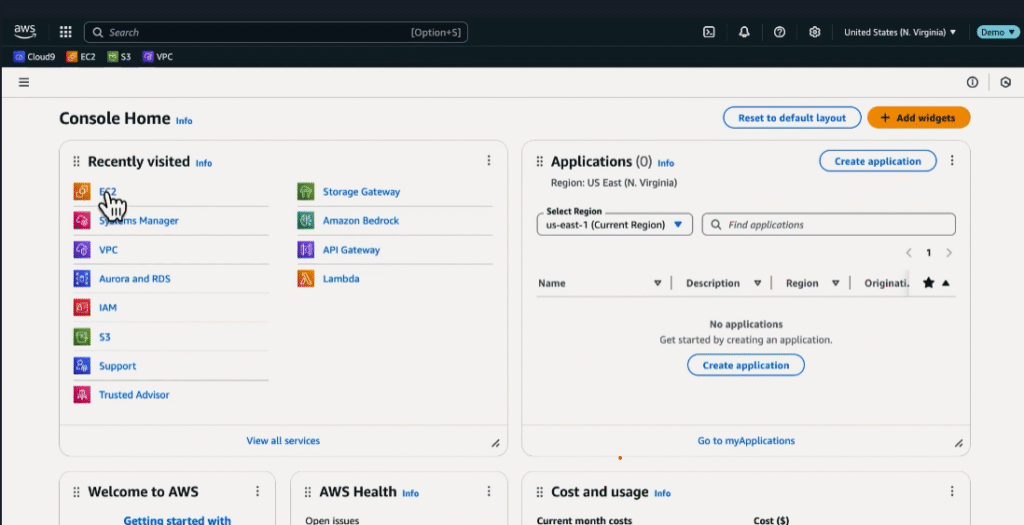
Step 1 → Log in to AWS and Go to EC2
Go to AWS Console.
Step 2 → Start a New Instance
- Click Launch instance.
- Give it a name like
MyWebServer.
Why? — So you can find it later.
Step 3 → Choose an Operating System
- Select Amazon Linux 2 AMI (Free tier eligible).
Why? — It’s a light, safe system that works perfectly on AWS.
Step 4 → Choose the Size
- Select t2.micro.
Why? — It’s small, free, and good enough for learning.
Step 5 → Create or Choose a Key Pair
- A key pair is like a special password.
- If you don’t have one, create and download it.
Why? — It’s how you log into your cloud computer later.
Step 6 → Network Settings
- Tick Allow HTTP traffic from the internet.
Why? — HTTP lets people visit your website. - Tick Allow SSH traffic (optional).
Why? — SSH lets you control the computer using commands.
Step 7 → Storage
- Keep it 8 GB gp3.
Why? — Enough space for a small website.
Step 8 → Add a Script to Install Nginx
We want our server ready when it starts — no extra typing later.
In Advanced details → User data, paste:
#!/bin/bash
yum install -y nginx
systemctl start nginx
systemctl enable nginx
Why?
yum install -y nginx→ Installs the Nginx program.systemctl start nginx→ Starts it right now.systemctl enable nginx→ Makes it start every time the server restarts.
Step 9 → Launch the Instance
- Click Launch instance.
- Wait for it to say Running.
Step 10 → See Your Website
- Go back to the EC2 dashboard.
- Find your instance and copy its Public IPv4 address (e.g.,
54.123.45.678). - Paste this IP in a browser and press Enter.
What You Learned
- EC2 = A computer in the cloud.
- Nginx = A program that shows websites.
- User Data Script = Instructions for your computer to follow automatically.
Now you can tell your friends — “I have my own website server!” 🚀
Script details. (If you dont know )
1. What is ? #!/bin/bash
#!→ Called a shebang.- Tells the computer: “Run this file using the program that follows.”
/bin/bash→ Path to the Bash shell program. Bash is a command-line interpreter — it understands and runs the commands you write.
💡 Meaning:
“When you start this script, use the Bash program to read and execute it.”
2. yum install -y nginx
yum→ Stands for Yellowdog Updater, Modified.
It’s a package manager used in Amazon Linux, CentOS, and RHEL.
Its job: Install, update, or remove software.install→ The action you want to perform — install a program.-y→ Means “yes to all questions.” Without this,yummight ask:
‘Do you want to install nginx? (y/n)’ — This flag answers yes automatically.nginx→ The program to install. Nginx is a popular web server.
💡 Meaning:
“Install the Nginx web server without asking for confirmation.”
3. systemctl start nginx
systemctl→ Command to control system services (start, stop, restart, etc.).start→ Action — start running the service.nginx→ The service to start.
💡 Meaning:
“Start running the Nginx web server right now.”
4. systemctl enable nginx
systemctl→ Again, the service control command.enable→ Action — make the service start automatically on system boot.nginx→ The service to enable.
💡 Meaning:
“Make sure Nginx starts automatically every time the computer is turned on.”
In Simple Words:
Your script is saying:
- Use Bash to run these commands.
- Install Nginx automatically.
- Start Nginx immediately.
- Make Nginx start every time the server restarts.